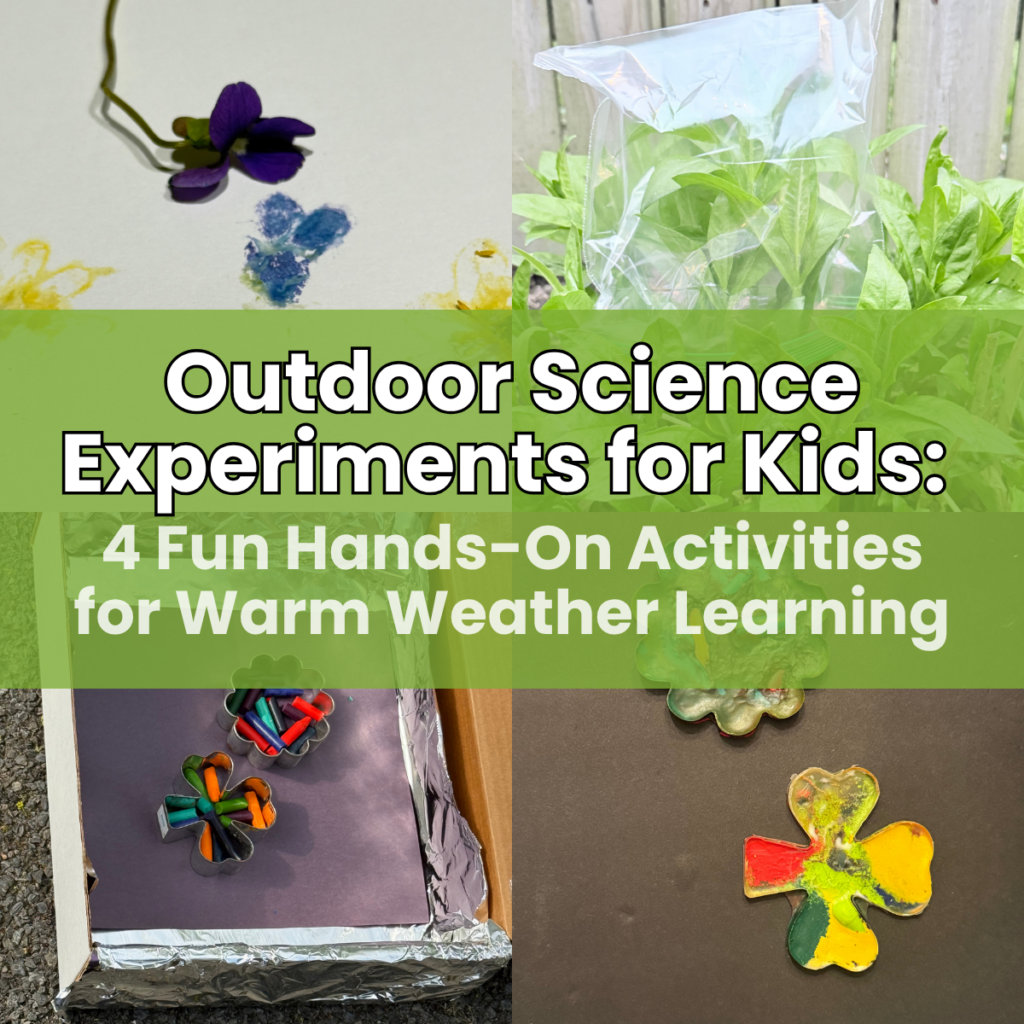
Outdoor Science Experiments for Kids: 4 Fun Hands-On Activities for Warm Weather Learning
When the warm weather rolls in, I love to head outside with the kids and tackle some fun outdoor science experiments and nature STEM projects. There are so many opportunities to use the world around you to teach kids with hands-on, real-life scenarios that are sure to leave an impression on their little minds. Plus fresh air and sunshine just makes learning more fun. Right?
These outdoor science experiments for kids are some of my favorites because they are mostly low prep, low cost, and ready to roll out anytime the mood strikes (or the weather is cooperating). We are going to tackle four projects the kids are sure to love.

Why Take Science Experiments Outdoors?
Table of Contents
Disclaimer: This article may contain commission, paid partnerships, or affiliate links. We independently review everything we recommend. When you buy through our links, we may earn a commission from qualifying purchases.
Outdoor spaces give kids the room to be loud, messy, and active in a way that just is not possible at the kitchen table. They can spread out, splash water, hammer leaves, and watch the sun do its work without anyone worrying about the carpet. The world outside is also full of free science. Sun, wind, plants, and bugs all become part of the lesson.
Hands-on learning sticks. When kids smell the leaves, feel the warmth of a solar oven, or watch a paper change color before their eyes, they are not just memorizing a concept. They are living it.
Safety Tips for Outdoor Science Experiments
These projects are safe for ages 5 to 12 with adult supervision. Take a quick minute to review the basics before you start:
- Watch the sun. UV rays are strongest in the middle of the day. Have kids wear hats, sunscreen, and stay hydrated.
- Keep an eye on tools. The pounded art project uses a mallet, and the solar oven uses cookie cutters and scissors. Adults should handle any cutting of cardboard or plastic.
- Mind the heat. The inside of a solar oven gets warm. Use oven mitts or wait until it cools to handle the contents.
- Pick a safe pounding surface. Concrete or a sturdy tabletop works best for the pounded art project. Avoid hands and fingers.
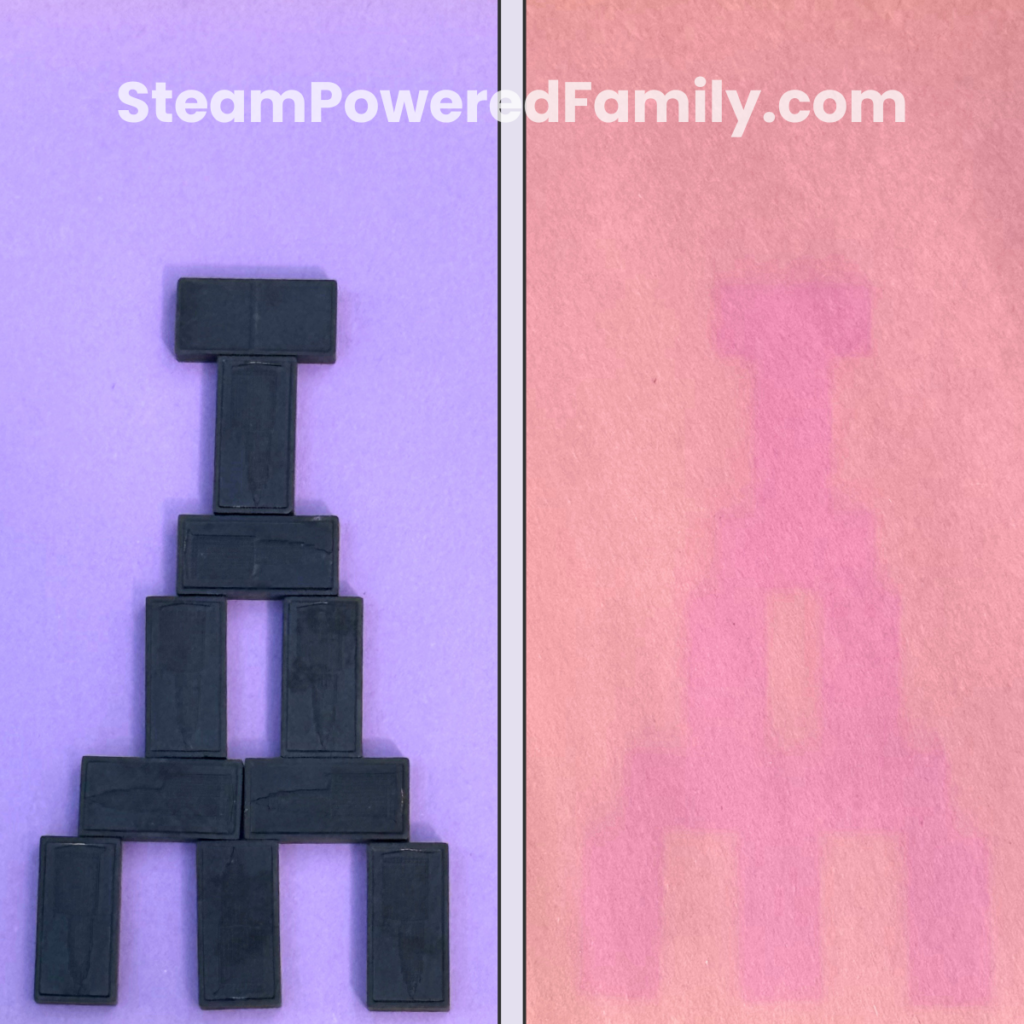
Project 1: Sun Prints
Did you know that you can harness the power of the sun to make some pretty cool art and have a discussion about UV rays at the same time? We are going to use some simple construction paper and found objects to create sun prints.
What Do You Need?
- Colored construction paper (darker colors will work better)
- Some coins, rocks, solid toys, or other household or classroom items that will sit flat on your paper and not blow away if it is a little windy
- A sunny day
How to Do It
- Have the kids place their paper in a sunny spot and arrange their items to make a picture, a shape, or a letter.
- Leave the paper in the sun for at least a couple of hours, or longer if possible. (Place them in the morning and come back after lunch.)
- While the papers are in the sun, have a chat with the kids about the sun’s UV rays.
- Have the kids remove the solid pieces from the paper.
- Observe. What happened? Why do you think that happened?
- Follow up with a discussion on the chemical change that just took place. How can they relate it to being in the sun? What can they do to protect themselves?
What Is UV Light?
The sun gives off energy we cannot see, called ultraviolet light. UV rays are strongest in the middle of the day, and these are the rays that can give you a suntan or a sunburn if you go out without protection.
Ask the kids: “What do you think will happen with the papers when we leave them in the sun?”
The Science
UV rays are extremely powerful. They can actually break down the chemical bonds in the dye on the paper. This process is called photodegradation. When the UV light hits the dye, the color fades and gets lighter. The objects act like a sunscreen, protecting the areas underneath from fading.
To protect themselves from UV rays, kids can wear sunscreen, wear hats and long sleeves, and stay out of the sun in the afternoon when UV is at its peak.
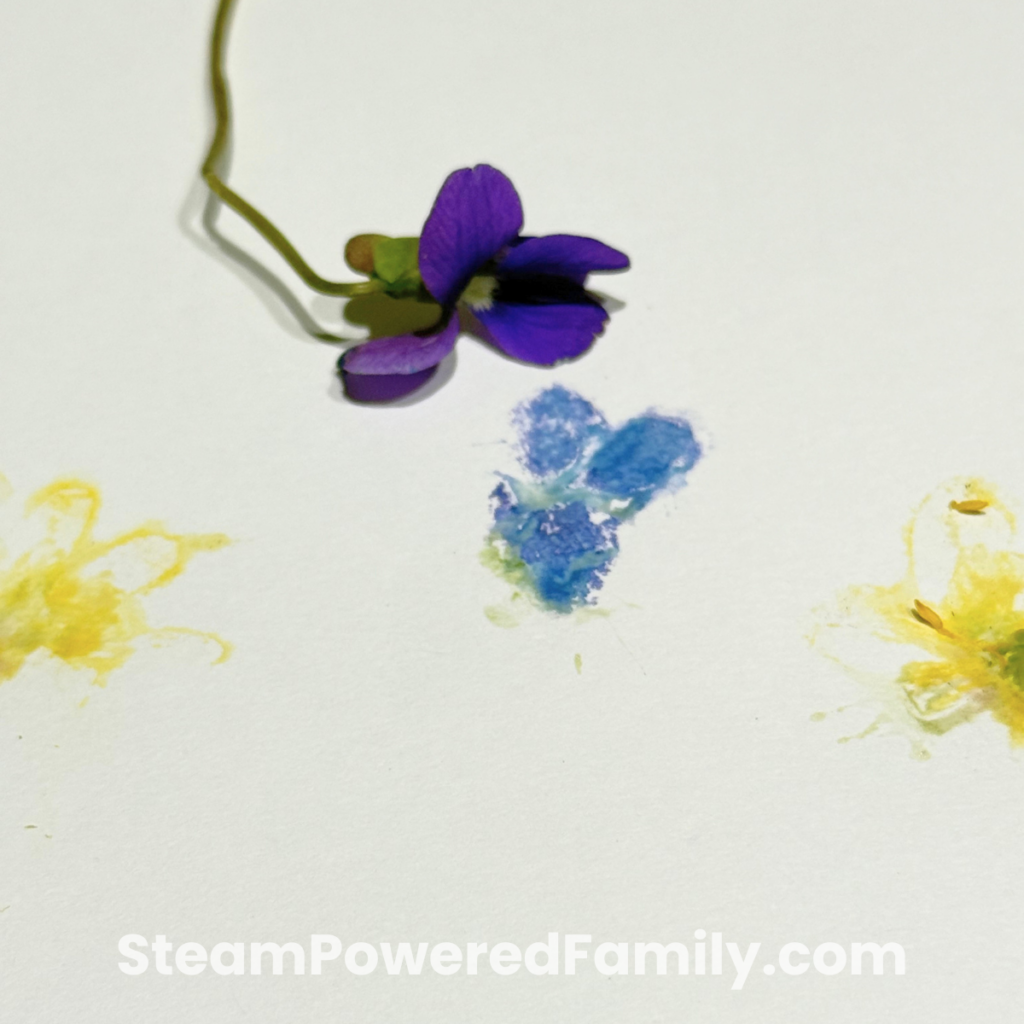
Project 2: Pounded Art
Did you know that you can make natural art by pounding leaves or flowers onto a piece of paper? It is a fun lesson in plant color, the physics of force and motion, and botanical art all rolled into one, and they are using natural elements straight from the yard.
What Do You Need?
- A handful of leaves (and flowers if you have them)
- Wax paper
- A rubber mallet or similar tool
- Sturdy paper, like watercolor or mixed media paper
The Lesson
The color on leaves and flowers is not painted onto the outside. It lives deep in the plants in cells called chloroplasts. We are going to use the mallet to break apart the chloroplasts and transfer the color onto the paper.
The green pigment we will see is called chlorophyll, and the red and purple pigments are called anthocyanins.
You can also talk to the kids about the physics of force and motion. When they tap the mallet on the paper and leaves, they are using mechanical energy to apply force and pressure to the plant. That force opens the chloroplasts and transfers the color to the paper.
How to Do It
- Have the kids place a leaf on their piece of paper.
- Place a layer of wax paper over the leaf.
- Pound the leaf with the mallet. You do not need to pound really hard, just hard enough to break the leaf surface.
- When they have pounded all of the parts of the leaves, peel back the wax paper and the leaf to admire their leaf transfer art.
The ooooooos and aaaahhhhhhs when they peel back the leaves is always such a fun ah-ha moment.
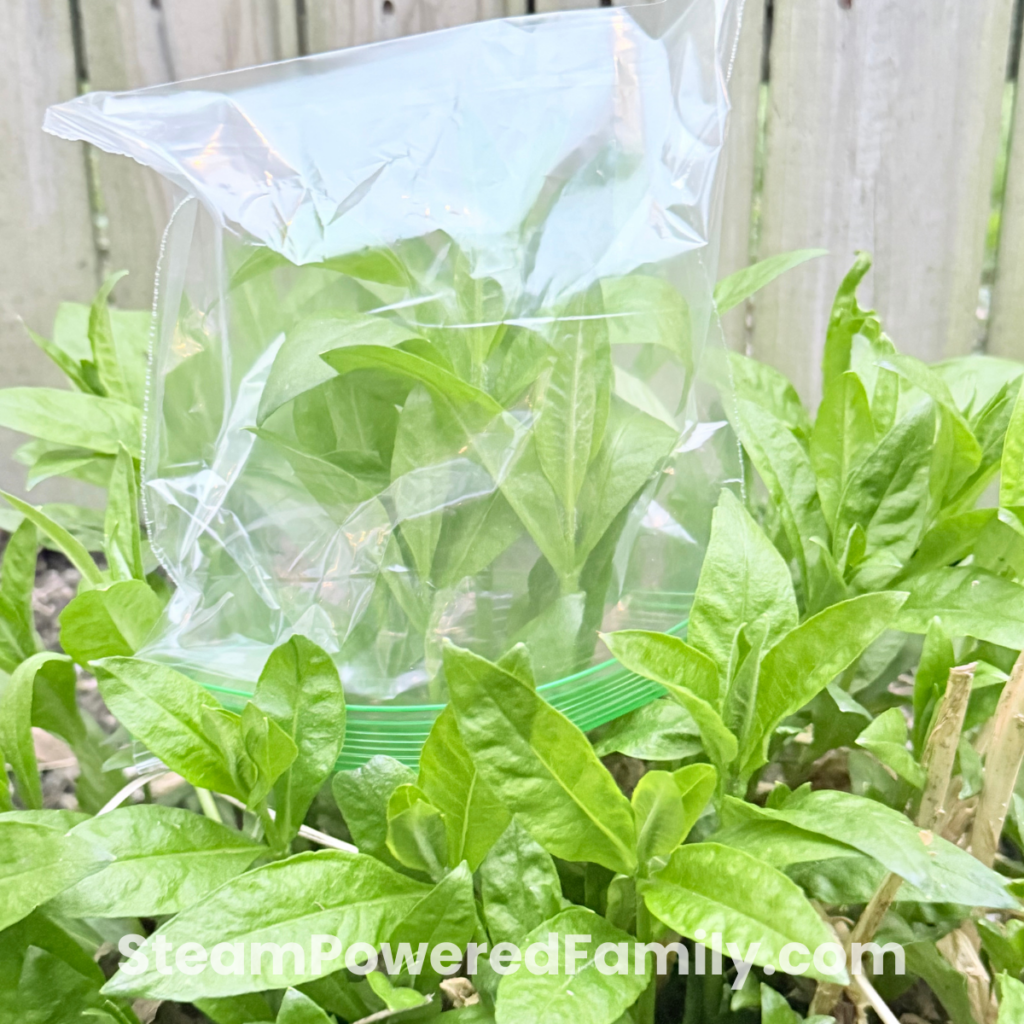
Project 3: Transpiration Observation
Kids learn about the water cycle early in school, and there are tons of ways to teach about it, but there is something special about simple observation that really hits home.
If you want a deeper dive, we did a full water cycle lesson on SPF that pairs beautifully with this activity.
A Quick Explanation of the Water Cycle
When the sun shines on the earth, it warms the water found in lakes, rivers, streams, and even the ground and plants. As the water heats up, it transforms from its liquid form into vapor, which is water in its gas form.
This process is called evaporation. When water is released from plants, it is called transpiration. As this gas rises into the atmosphere, the water vapor gathers together and forms clouds. That process is called condensation. When the clouds get dense and full, they release the water back down to the earth in a process called precipitation, which we see as rain, snow, or sleet.
The water collects, feeds the plants and animals, gets stored in lakes, rivers, plants, and ground, and then the cycle starts all over again.
For this project, we want to check out the transpiration part of the water cycle.
What Do You Need?
- A plant, preferably one with wider leaves
- A clear plastic bag
- A twist tie or piece of string
How to Do It
- Tell the kids you are going to use the bag to trap transpiration in action. Ask them what they think it might look like.
- Carefully slide the plastic bag over a small group of leaves and seal it at the bottom.
- Let the sun do its thing. As the plant sits in the sun, water droplets will begin to form on the inside of the bag and the kids will be able to watch them appear.
You can talk to the kids about why we do not usually see transpiration. The water turns into an invisible gas as it is released from the plants. By putting the bag over the leaf, we trapped the gas, which then turned back into water droplets we could see.
This is a great visual project the kids are sure to remember.
Project 4: Can We Use a Solar Oven to Melt Crayons?
You might remember our solar oven s’mores we did a while back. We are going to pull out that solar oven to make some melted crayon mosaics for a pretty window decoration, or even use them as crazy rainbow crayons. It is totally up to you.
How a Solar Oven Works
The solar oven works by reflecting and trapping the sun’s heat, which is also called thermal energy, to cook or melt something. We are going to use aluminum foil to bounce the sun’s rays in the direction we want, and a black liner under some crayon shavings to absorb and distribute that heat to melt the crayons into the shape we want.
So the light energy that gets reflected into the box is converted into heat. That heat melts the solid wax and turns it into a liquid.
What Do You Need?
For this simple project, you will need a cardboard box with a lid. It could be a flip-up lid like a pizza box or a sit-on-top lid like a shoe box. I am using a paper box we had in the office at school.
- Cardboard box with a lid (shoe box or pizza box)
- Aluminum foil
- Clear plastic wrap
- Scissors
- Tape
- Black construction paper or fabric
- Old cookie cutters
- Old crayons (with labels removed)
How to Do It
- Cut a frame about the width of a ruler around 3 sides of the lid: the front and the two sides. Leave the back side intact so the cut piece can fold up and flip back. This is the part that will reflect the sun, and being able to move it lets you adjust for maximum reflection.
- Line the box and the flip-up lid with aluminum foil. Make sure you do this shiny side out for the best results.
- Secure plastic wrap over the opening created by the flip-up lid. This protects your project from outside elements and helps trap the heat inside the oven. You can secure it with tape or wrap it around the opening a couple of times and tape it to itself.
- Line the bottom of the box with black paper or fabric to absorb heat.
- Peel the labels off some old crayons and break them into smaller pieces. Place a piece of clear plastic as a protective layer over the black paper, then place your cookie cutters on top. Carefully put crayon pieces inside the cookie cutters.
- Close the cover so the plastic wrap top is securely in place, then flip the lid up so it reflects the sun into the box. If needed, prop it with a pencil or a ruler.
- Watch and wait.
- Once the crayons have melted, you can use a toothpick to swirl them around if you want, or leave the melty bits chunky.
- Take the oven inside to cool off and let the melted wax harden back up.
- Carefully remove the creation from the cookie cutter. Use it as a crayon, or add a hanger and hang it in a window.
If they love this project, try melted crayon art for another fun summer project that uses the sun and some rocks. They are sure to love it.

Encouraging Scientific Thinking Outdoors
Each of these projects becomes more powerful when you weave in a little structured thinking. Try working these prompts into your conversations as the kids experiment:
- What do you predict will happen before we start?
- How does changing one variable, like the time in the sun or the type of leaf, affect the result?
- What did you observe that surprised you?
- How can you explain the reaction or result?
- Where might you see this kind of science in real life?
These questions turn a fun afternoon outside into a real scientific inquiry, and they are easy to slip in without it feeling like a lecture.
Extension Ideas
Once the kids fall in love with outdoor experimenting, keep the momentum going:
- Have students design their own outdoor experiment from scratch.
- Turn one of these activities into a science fair project.
- Add data collection, charts, or graphs to compare results between trials.
- Start a science journal where kids sketch what they observe.
- Document the project with photos or a short video.
If your crew loves a big outdoor reaction, send them straight into bottle rockets, or bring some chemistry inside on a rainy day with a DIY lava lamp. For sensory science fans, try oobleck outside on a hot day or whip up some glow in the dark jello for an edible chemistry experiment that is pure summer magic.
Want to combine art and motion? Our water bomb art project is a backyard hit that pairs perfectly with these outdoor experiments.
Final Thoughts on Outdoor Science Experiments and STEM Learning
All of these outdoor projects are perfect for a beautiful spring or summer day with the kids. They are low cost, low prep, and high return. And the learning, well, I always feel like hands-on learning is the best kind of learning. The smiles, the surprised reactions, and the questions that pour out afterward are proof that science was happening all along.
Pick one project, head outside, and let curiosity take it from there.
Frequently Asked Questions
Simple activities like sun prints, pounded leaf art, transpiration observation, and solar oven crayon melting all work beautifully outdoors. Bottle rockets, vinegar reactions, and water experiments are other classic outdoor favorites.
Outdoor spaces let kids work bigger, messier, and louder than they could indoors. The sun, wind, plants, and weather also become part of the lesson, which gives kids real-world context they can see and feel.
Most outdoor science experiments can be adapted for children ages 5 to 12. Younger kids may need extra help with cutting, pounding, or handling the solar oven, while older kids can take on more independence and run their own variables.
Most outdoor science experiments use common household items like construction paper, leaves, plastic bags, cardboard boxes, aluminum foil, baking soda, water, and food coloring. Almost everything you need for these four projects is probably already in your kitchen or recycle bin.
Hands-on outdoor experiments encourage observation, prediction, and real-world application of science concepts. Kids practice using the scientific method, sharpen their critical thinking, and build the kind of memory you only get from doing the work yourself.